This site is under construction due to recent updates to the Navigate appointment campaigns functionality. Pardon our dust, and thank you for your patience. Please email navigate@uoregon.edu with any questions.
Appointment Campaigns in Navigate
Contents:
- What is an Appointment Campaign?
- Creating an Appointment Campaign
- Appointment Campaign Screenshots
- Managing a Campaign
- Navigate Help
What is an Appointment Campaign?
An appointment campaign is an easy way to invite a group of students to schedule an appointment with advisors by email. The email sent from an appointment campaign includes a unique scheduling link to schedule the appointment with the advisors who are part of the campaign. The campaign tracks who has and hasn't made appointments. The campaign owner can resend the invitation (and update the email language if they wish) to students who have not yet scheduled.
In smaller departments, advisors generally create the campaign under their own account, and the campaign email is from their uoregon.edu email address. Some departments use "role accounts" that are not attached to one individual, such as uoadvising@uoregon.edu. To do this, the person creating the campaign will need to log in to Navigate with that role account.
The main benefits of appointment campaigns are:
- Campaign email includes a scheduling link that associates the appointment with the campaign (and campaign reason)
- Can invite students to schedule appointments that aren't open to general student population
- Advisor's availability can be different for campaigns vs. regular appointments (advisors may want to have special availability for a campaign)
- Campaign tracks the students: which students have scheduled, which students still need to schedule, and which appointments have had reports (appointment notes) created.
- The campaign owner can resend (and update the email content) to those who haven’t yet scheduled.
- The campaign owner can add/remove students as necessary
- Easy copy and paste list of student IDs from Excel or search directly in Navigate by major, assigned advisor, course, class level, etc. to create the campaign.
Creating an Appointment Campaign
It can be helpful to have this page open in one window and have Navigate open in another window, to follow along.
- Confirm Advisor's Campaign Availability
Have advisors set up campaign availability for the service (topic) that will be used in the campaign. If the advisors already have appointment availability set up for a service that will be used for the campaign, they do not need to set up additional availability. Students will not see this service. If advisors want the campaign to offer unique days/times for appointments, create a new availability record(s) just for campaigns with the matching service.
- Search for and Add Students
To use "My Assigned Students" list for the campaign (note - this will include UG and GR if applicable), start on Navigate home, check the ALL box above the list of students, and then click Actions > Appointment Campaign (skip to step 3 below).
To do an Advanced Search for students in Navigate, or if you have a list of IDs from an external source, go to Advanced Search (magnifying glass on left) in Navigate, select the search criteria (or paste in the list of IDs from Excel), and click Search. Common search criteria include major (Area of Study > Major (In Any of these), minor (Student Information > Category > "minor - [minor]"), admit term (Category > admit [term]) class level (Classification (In Any of these), assigned advisor (Assigned To > select Advisor > type Staff name. Click Search and then Save (the button to the right of "Unsaved Student Search").
Now, check the box next to ALL to select all students on the list. Or, select which students you want from the list. Click Actions > Appointment Campaign to create the campaign.
- Define Campaign
You will set the criteria for your Appointment Campaign. Note that if other advisors are going to be included in this campaign, the reason/location/date range must align with Campaign Availability for the advisor(s) that are going to be included in the campaign.
- Campaign Name is internal use only, and only visible to the person creating the campaign and any other users who have access to view campaigns, but it is NOT visible to the student. Please be sure to include the term name in your campaign title (i.e. 202201 or Fall 2022).
- Care Unit = your college or advising unit
- Location = your department
- Service = select service that will be associated with the campaign. This is not visible to the student. Advisors can add additional services to the appointment summary when the appointment occurs.
- Begin and End Dates = These are the dates that the link will be active for students to schedule appointments for the campaign. You can always extend the campaign dates. The appointment availability set up by the advisor(s) dictates the actual available appointment dates/times.
- Appointment Limit = Number of appointments you wish for the student to schedule during the campaign. The link in the email will stop working for the student once they schedule this number of appointments. Often this is only 1, but you may want the student to be able to schedule up to 3 appointments, for example, if this campaign is used for an entire term.
- Appointment Length = How long the appointment will be (remember to include time for typing up notes/transition; 20 minute appointments might be 30 for actual appointment length in order to include notes and transition time)
- Slots per Time = Appointments can be individual or group. Usually, this is 1. By adding more than one "slot per time" more than one student can schedule at the same time (group appointments - this is less common).
- Review Students
Remove/Add students if necessary > then Continue
- Add Staff
Check the "Include Appointment Availabilities box" if you want students to schedule during advisors' regular appointment times. Otherwise, only advisors who have availability set up for this campaign service will appear. Add advisors who should be included for appointment scheduling for this campaign, and then click Continue.
- Compose Your Messages
Nudge 1 is the original campaign message, and the other nudges are follow-up/reminder emails until the student schedules the required appointment(s). Success Message is optional and is sent once the student schedules all of the required appointment(s).
Navigate displays a template email so you can see how your message is looking. Edit the subject line and email text. Considerations:
- Be sure to leave the {4schedule_link} in the email – this is the unique scheduling link they will receive that will associate the appointments with this campaign
- {$student_first_name} is also a merge field to add the student's first name - this is optional but does add a personalized touch to the email
- Include why they are being asked to schedule an appointment
- Include how the appointment will take place (advisor will call on Teams, send a Zoom link, etc.)
- Adding an attachment to the email is optional; this will work if the attachment is the same for all students in the campaign
Be sure to add your email signature as it will not automatically be added. You can also customize/add instructions for the landing page; the page that students land on when clicking the campaign scheduling link. For example, you may want to add "Please be sure to add your phone number to receive appointment text reminders and so that we can reach you if necessary." Review the email preview on that same page, make changes as necessary, and then click Continue.
- Confirm & Send
This page summarizes your campaign information and settings. Attendee Reminders default to E-mail for Organizer (advisor) and both E-mail and SMS (text) for Non Organizer (student). When ready, click Send. You should see a Congratulations! message. The campaign email with a scheduling link will be sent to all students in the campaign.
Campaign Screenshots
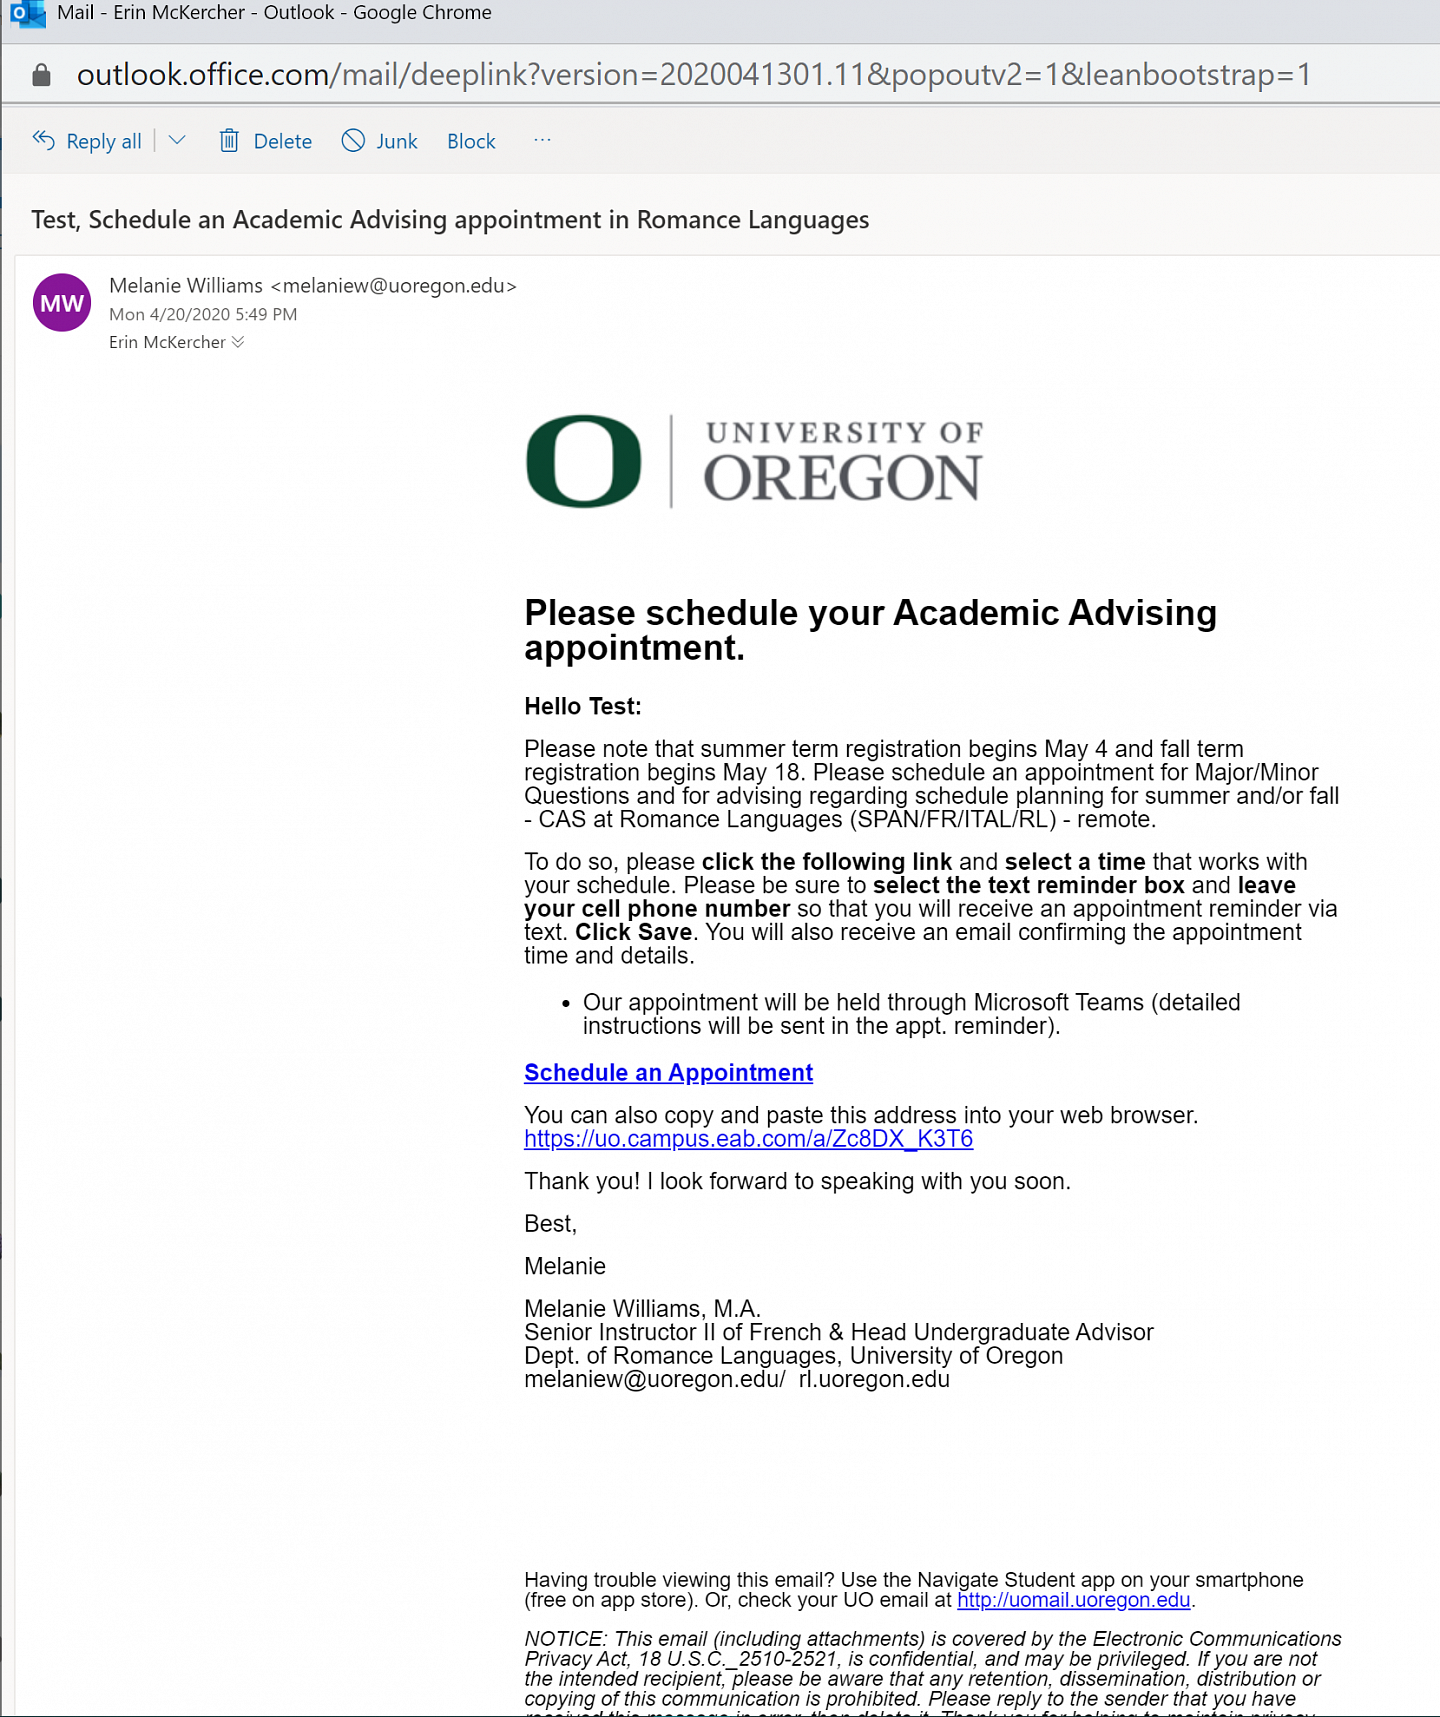
Example of a campaign email:

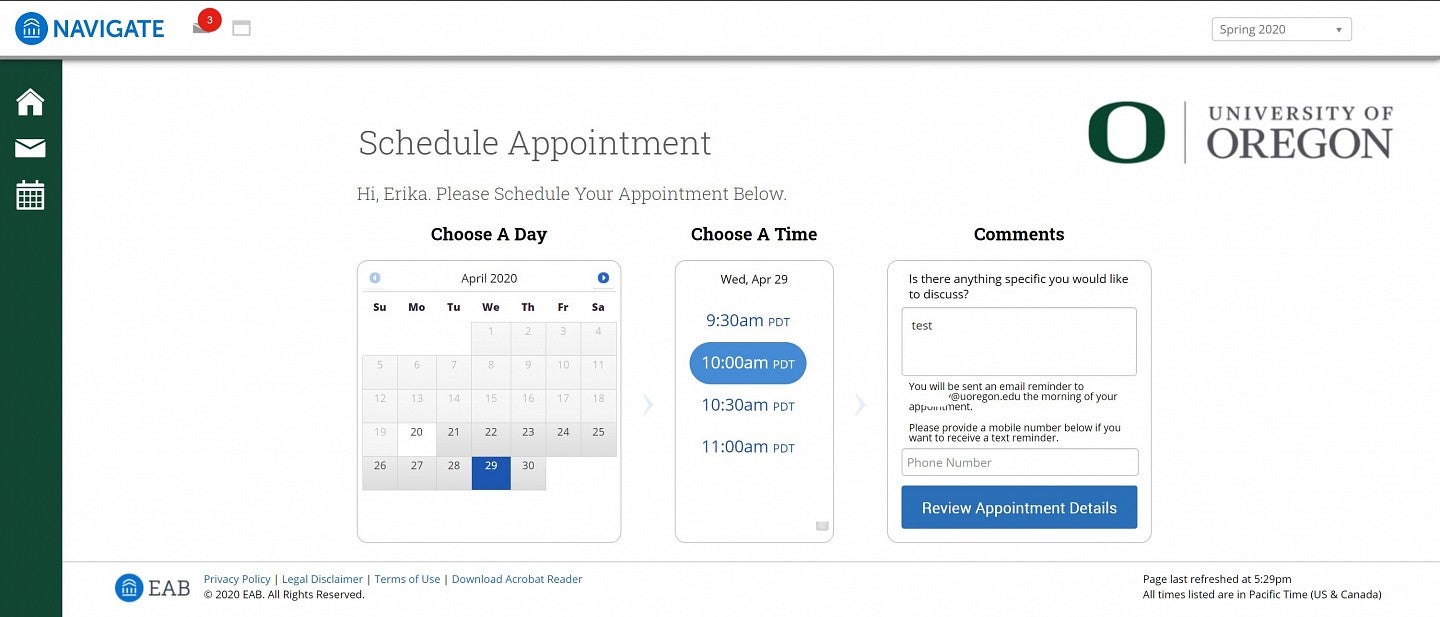
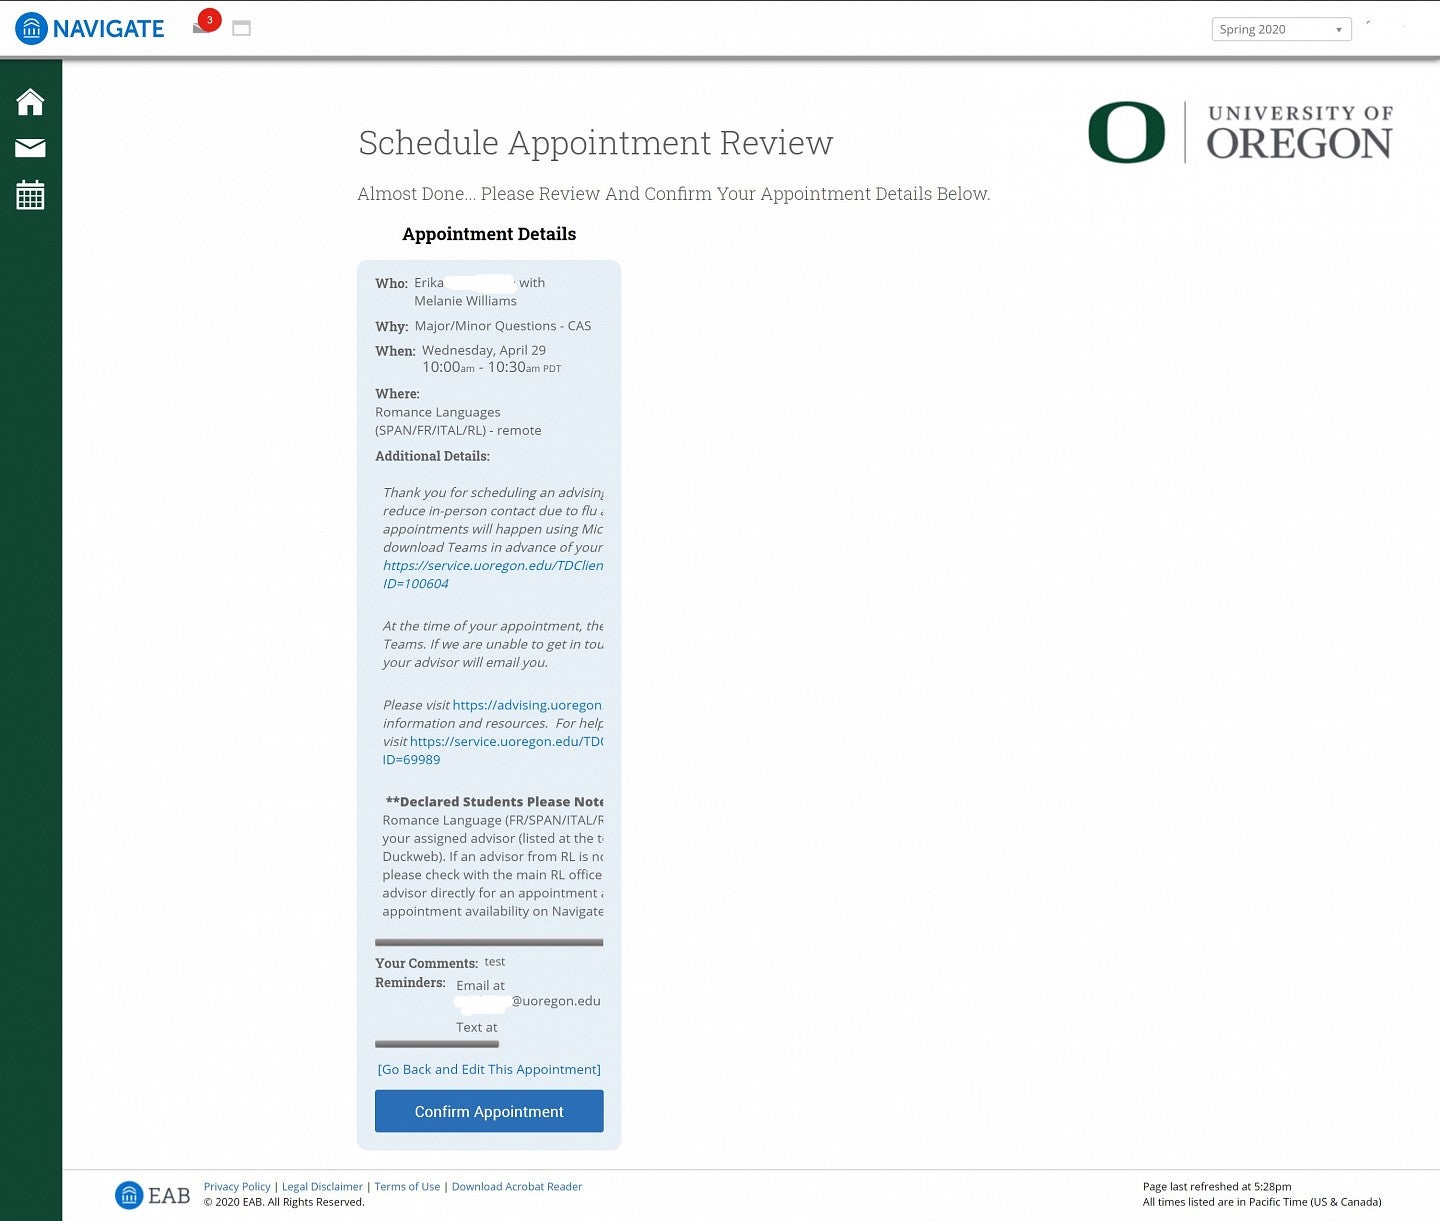
Example of scheduling page and confirmation page student sees when scheduling a campaign email:


Managing an Appointment Campaign
- From your Navigate home page in the Quick Links box to the right, click on Appointment Campaigns.
- Click on the name of the campaign you wish to edit. (Or, if you're still in the process of setting the campaign up, click the Resume button.)
- In the Options box to the right, click on Edit Campaign Details.
- Click Edit next to the section you wish to edit. Once you are editing a section, such as Student Select, you can click the links across the top to navigate to other parts of the campaign setup.
- To add more students to your campaign, go to the Review Students section.
- At the bottom click on Add More Students. This will load the Advanced Search page within your campaign.
- Paste in the ID numbers in Keywords, or select your search criteria, and click Search.
- Then select ALL or select the students to add to the campaign > then click Actions > Add Selected Users and Search For More, and then click Continue at the bottom.
- You should see a full list of students in the campaign, including the students you just added. You do not need to check any boxes. Click Continue.
- You will see the Add Staff page. Just click Continue.
- Then you will see the email. You can edit if you wish and then click Send. You will see a pop-up message - you can choose to Invite Only New Students, or Re-send All Student Invitations, which will go to all students in the campaign, including the ones you recently added.
- You should now see a Congratulations! message. The campaign email with a scheduling link will be sent to all students in the campaign. You will not receive a copy of this email. You can go to a student's profile in Navigate who is part of the campaign and then click on the Conversations tab if you wish to view the email.
Erin McKercher
Advising Technology Manager
navigate@uoregon.edu
